Dill is an easy to grow plant for both novice and experienced gardeners due to its simple sowing process, low maintenance needs, adaptability, pest resistance, and suitability for containers. Whether you have a large garden or a small balcony, dill can thrive with minimal effort.
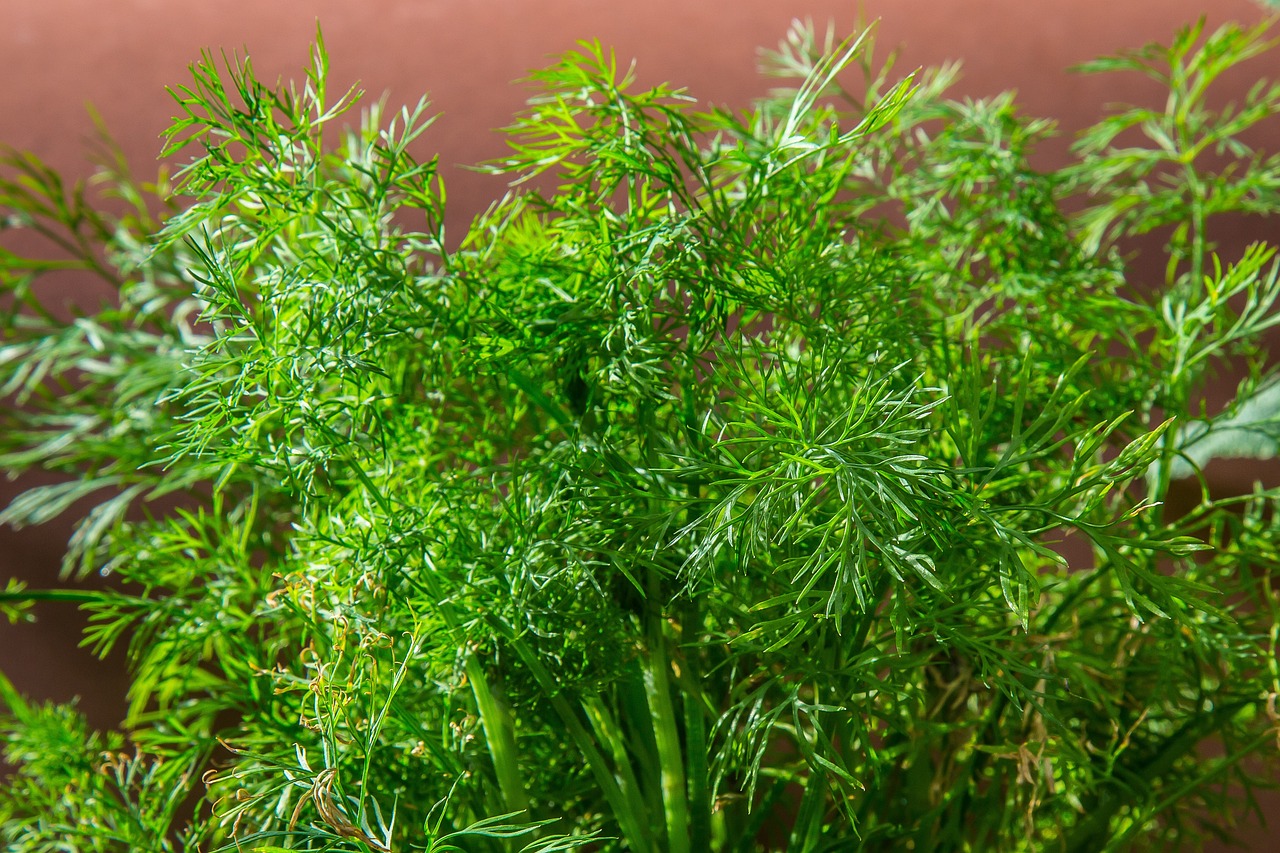
Dill plants add beauty to a garden with their delicate foliage, elegant flowers, graceful stems. They also emit a pleasant, distinctive aroma that enhances the sensory experience of a garden. The scent is a fresh combination of sweet and tangy, often described as a mix of anise and citrus.
Description
Dill (Anethum graveolens) is an annual herb in the family Apiaceae. It’s native to the Mediterranean and West Asia and is widely cultivated for its aromatic seeds and leaves, which are used for culinary and medicinal purposes.
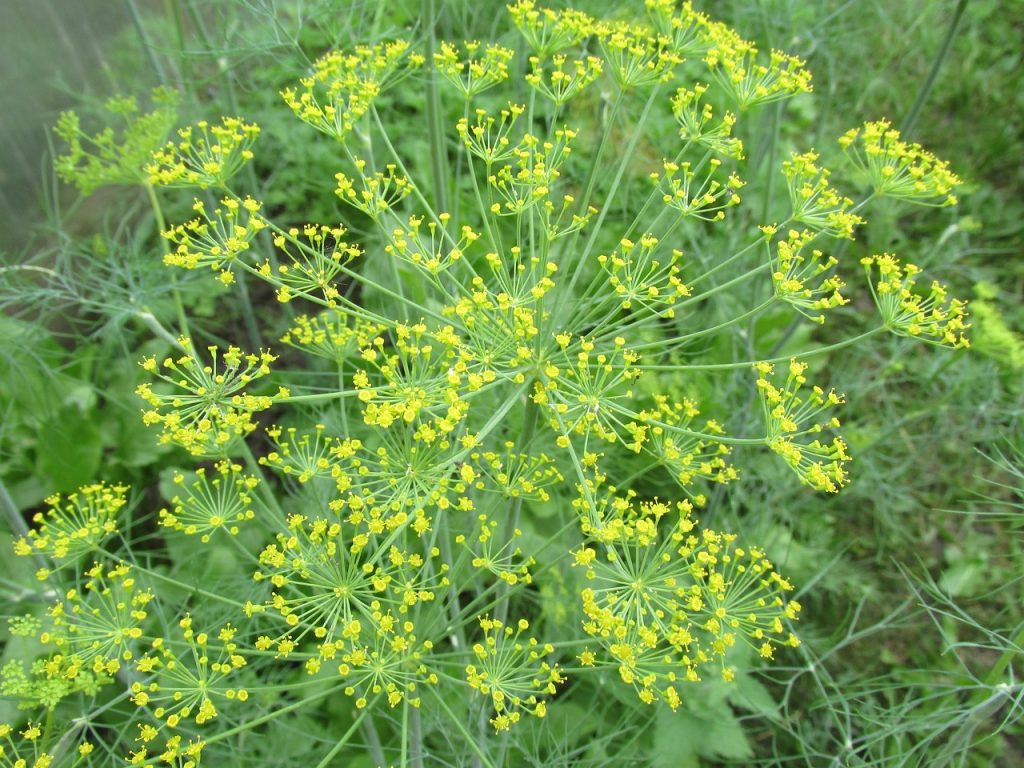
Dill has feathery, delicate leaves that are dark green to bluish green. The leaves are finely divided and look similar to fennel leaves. Plants produce small, yellow flowers that form in large, flat-topped umbels (flower clusters).
Dill leaves, often referred to as dill weed, are used fresh or dried to flavor a variety of dishes, including salads, soups, sauces, and fish. Dill seeds are used as a spice in pickling, bread, and other recipes. Dill is rich in vitamins A and C, essential for immune function and skin health. It also provides calcium, iron, and manganese.
| Botanical name: Anethum graveolens | Propagation: Seeds |
| Common name: Dill, Dill weed | Soil type: Sandy loam |
| Family: Apiaceae | Soil pH: 5.5-6.5 |
| Plant type: Annual | Temperature: 60°F to 75°F |
| Hardiness zones: USDA zones 9-11 | Light: Full sun |
| Mature size: 2-5ft. tall, 1-2 ft. wide | Spacing: 12-18 inches |
| Flower color: Yellow | Pollination: Wind, insects |
| Time to harvesting: 40-60 days | Toxicity: Non toxic |
| Native area: Mediterranean and West Asia |
Temperature requirements
Dill grows best in temperatures ranging from 60°F to 75°F (15°C to 24°C). It thrives in cooler conditions, particularly during its early growth stages.
Dill can tolerate cooler temperatures and may even benefit from them. However, prolonged exposure to temperatures below 50°F (10°C) can slow down growth and development. While dill prefers cooler temperatures, it can still grow in warmer conditions as long as it receives adequate moisture and sunlight. However, prolonged exposure to temperatures above 75°F (24°C) may cause dill plants to bolt (produce flowers and seeds) prematurely.
Dill is sensitive to frost, so if you’re growing it in cooler climates, it’s essential to protect the plants from frost during the early growth stages. Covering the plants with a frost cloth or bringing containers indoors during frosty nights can help prevent damage.
Soil requirements
Dill prefers soil that drains well. Soggy or waterlogged soil can lead to root rot and other problems. Sandy loam soil is ideal for dill, but it can also grow in other soil types as long as they have good drainage.
Dill prefers a slightly acidic to neutral soil pH level between 5.5 and 6.5. You can test your soil’s pH using a soil testing kit available at garden centers or by sending a sample to a local agricultural extension service for analysis. If your soil is too acidic, you can raise the pH by adding lime. If it’s too alkaline, you can lower the pH by adding organic matter such as compost or peat moss.
Light/Sun requirements
Dill prefers full sun, which means it needs at least 6 to 8 hours of direct sunlight per day. Place your dill plants in a location where they will receive ample sunlight throughout the day. In areas with hot summers, provide some partial shade during the hottest part of the day to prevent stress.
When to plant Dill
In regions with temperate climates, dill can be planted in the spring once the soil has started to warm up and the risk of frost has passed. This is typically around the time of the last expected frost date in your area. You can plant dill seeds directly into the garden soil or start seeds indoors a few weeks before the last frost date and transplant them outdoors once the weather warms up.
In warmer climates where frost is less of a concern, you can sow dill seeds directly into the garden soil in late summer or early fall. Dill grows well in cooler temperatures and can tolerate light frosts, making it suitable for fall planting in many regions.
To extend the harvest period, plant dill in successive batches every few weeks throughout the growing season. This ensures a continuous supply of fresh dill leaves for culinary use.
If you’re growing dill indoors or in containers, you can plant seeds year-round as long as you can provide the right growing conditions, including sufficient sunlight and warmth. Indoor-grown dill can be started from seeds at any time of the year.
Garden preparation
Prepare the soil before planting dill seeds or seedlings by loosening it to a depth of about 6 to 8 inches (15 to 20 centimeters). Remove any weeds, rocks, or debris that could interfere with plant growth.
Planting Dill
If you’re planting dill seeds directly into the ground, sow them thinly about ¼ to ½ inch (6 to 12 millimeters) deep. Space the seeds about 12 to 18 inches (30 to 45 centimeters) apart in rows or clusters.
If you’re using seedlings or started plants, dig a small hole in the prepared soil that’s slightly larger than the root ball of the seedling. Gently place the seedling into the hole and backfill with soil, pressing down gently to secure the plant in place.
After planting, water the dill seeds or seedlings thoroughly to settle the soil and provide moisture. Keep the soil consistently moist but not waterlogged during the germination and early growth stages.
Care for Dill plants
Watering: Keep the soil consistently moist but not waterlogged. Water dill plants deeply whenever the top inch (2.5 centimeters) of soil feels dry to the touch. Avoid overhead watering, as this can lead to fungal diseases. Water at the base of the plants to keep the foliage dry.
Weeding: Keep the area around dill plants free of weeds, which can compete for nutrients and water. Regularly remove any weeds by hand or use mulch to suppress weed growth.
Fertilization: Dill doesn’t require heavy fertilization but can benefit from occasional feeding. Apply a balanced fertilizer once or twice during the growing season.
Mulching: Apply a layer of organic mulch, such as straw or shredded leaves, around dill plants to help retain soil moisture, suppress weed growth, and regulate soil temperature. Mulching also helps prevent soil erosion.
Pruning: Regularly prune dill plants to encourage bushier growth and prevent them from becoming too leggy. Pinch off the growing tips of the stems to promote branching and increase leaf production.
Winter Care: In colder climates, dill is typically grown as an annual and will die back with the onset of frost. If you want to extend the growing season, cover dill plants with a frost cloth or bringing containers indoors before the first frost.
How to grow Dill in containers
Choose a container that is at least 12 inches (30 centimeters) deep and has drainage holes at the bottom to prevent waterlogging. The container should be large enough to accommodate the dill plant’s root system and allow for proper growth.
Use a well-draining potting mix specifically formulated for container gardening. Avoid using garden soil, as it may compact and hinder drainage. A mix containing perlite or vermiculite helps improve aeration and drainage.
If planting dill seeds, sow them directly into the container to a depth of about ¼ to ½ inch (6 to 12 millimeters). Space the seeds evenly across the surface of the soil.
If using dill seedlings or started plants, gently remove them from their nursery pots and transplant them into the container, leaving a few inches of space between each plant.
Place the container in a location that receives full sun, meaning at least 6 to 8 hours of direct sunlight per day. If growing indoors, choose a sunny windowsill or provide supplemental grow lights.
Harvesting Dill plants
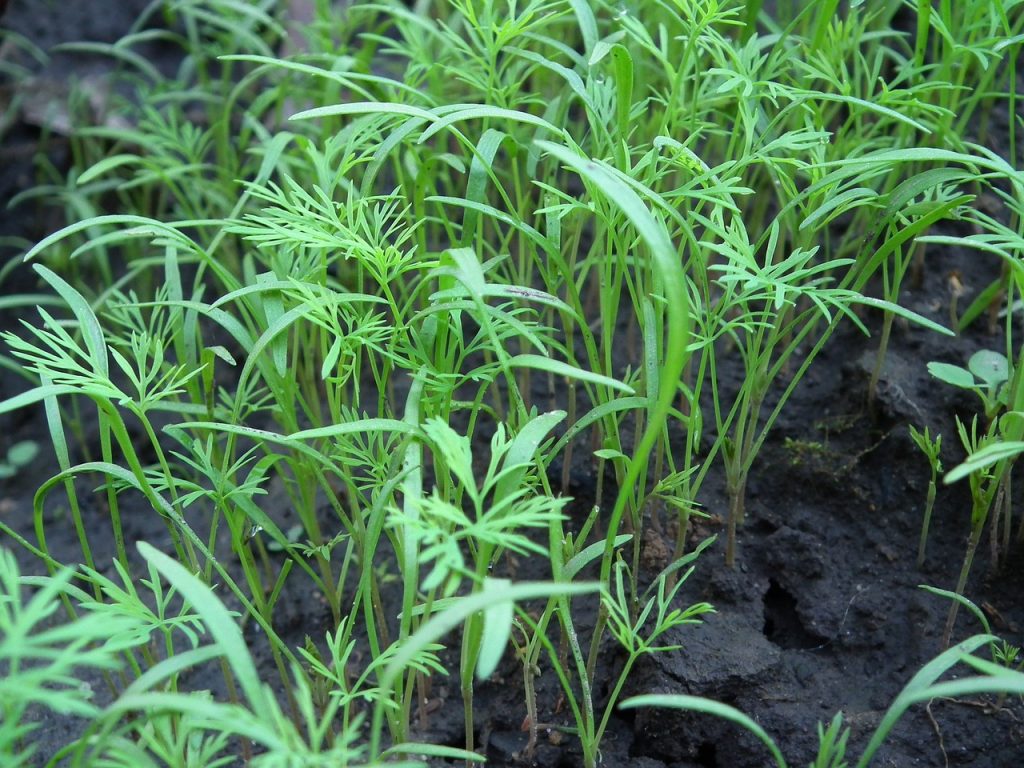
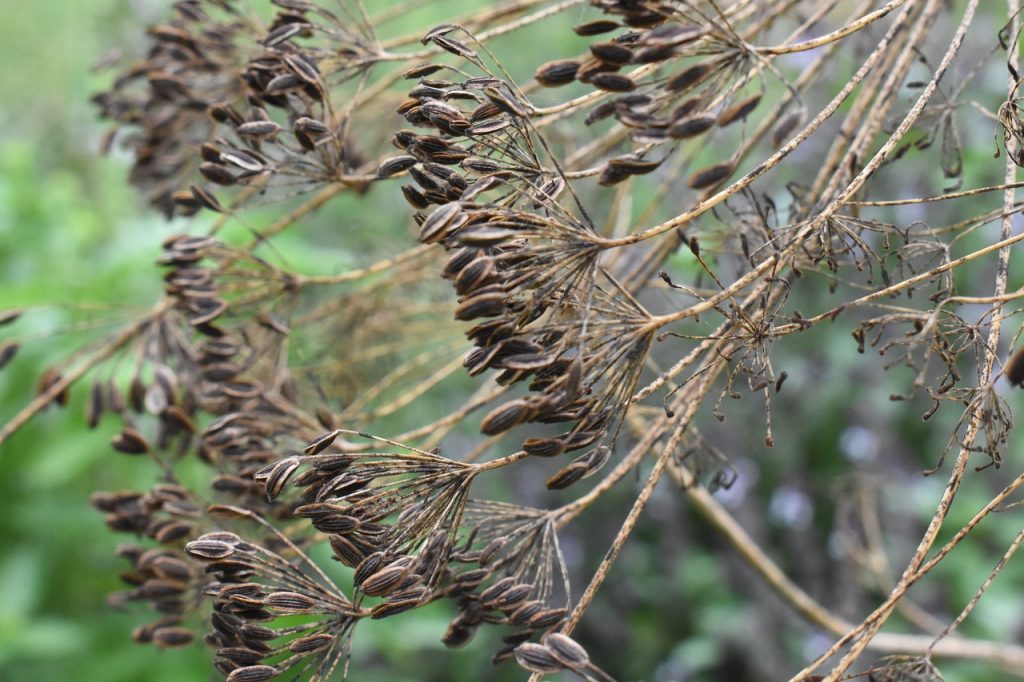
Harvest dill leaves as needed once the plants reach about 8 inches (20 centimeters) in height. Use scissors to snip off the desired amount of leaves, starting from the top of the plant. For seeds, wait until the flower heads turn brown and harvest them before they fully mature and drop.
Storing Dill
Fresh dill leaves can be stored in the refrigerator to extend their shelf life. Wrap the dill leaves in a slightly damp paper towel or kitchen towel to help retain moisture.
Place the wrapped dill leaves in a plastic bag or airtight container to prevent them from wilting. Stored this way, fresh dill leaves can last in the refrigerator for up to one to two weeks.
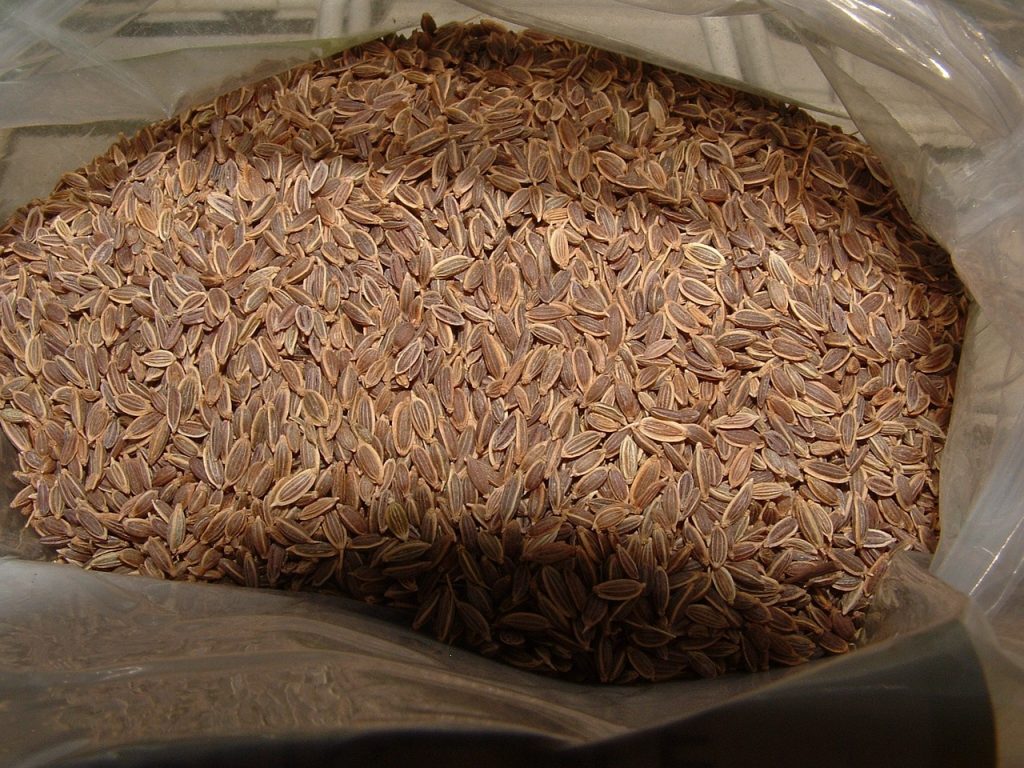
After harvesting dill seeds, spread them out in a single layer on a clean, dry surface, such as a tray or paper towel.
Allow the dill seeds to air dry completely in a warm, well-ventilated area for about 1 to 2 weeks.
Once fully dried, transfer the dill seeds to a clean, dry container for storage. You can use small jars, envelopes, or airtight plastic bags.
Store the dill seeds in a cool, dry place away from direct sunlight, such as a pantry or kitchen cupboard.
Properly stored dill seeds can remain viable for up to three years.
Best companion plants for Dill
Cabbage, Broccoli, Cauliflower, Kale, Brussels Sprouts, Cucumbers, Onions, Lettuce.
Worst companion plants for Dill
Carrots, Peppers.
Pests and Diseases
Common pests include caterpillars and aphids. Handpick pests or use natural pesticides to eradicate them.
Dill is relatively disease resistant but ensure good air circulation to prevent fungal diseases.